Cypress Framework
Table of contents
- Overview
- Key Features
- Getting Started
- Pre-requisites
- Install Cypress
- Clone the Project
- Project Structure
- Launching the Tests
- Running the Tests
- More About API Test Scripts
- More About UI Test Scripts
- Reports
Overview
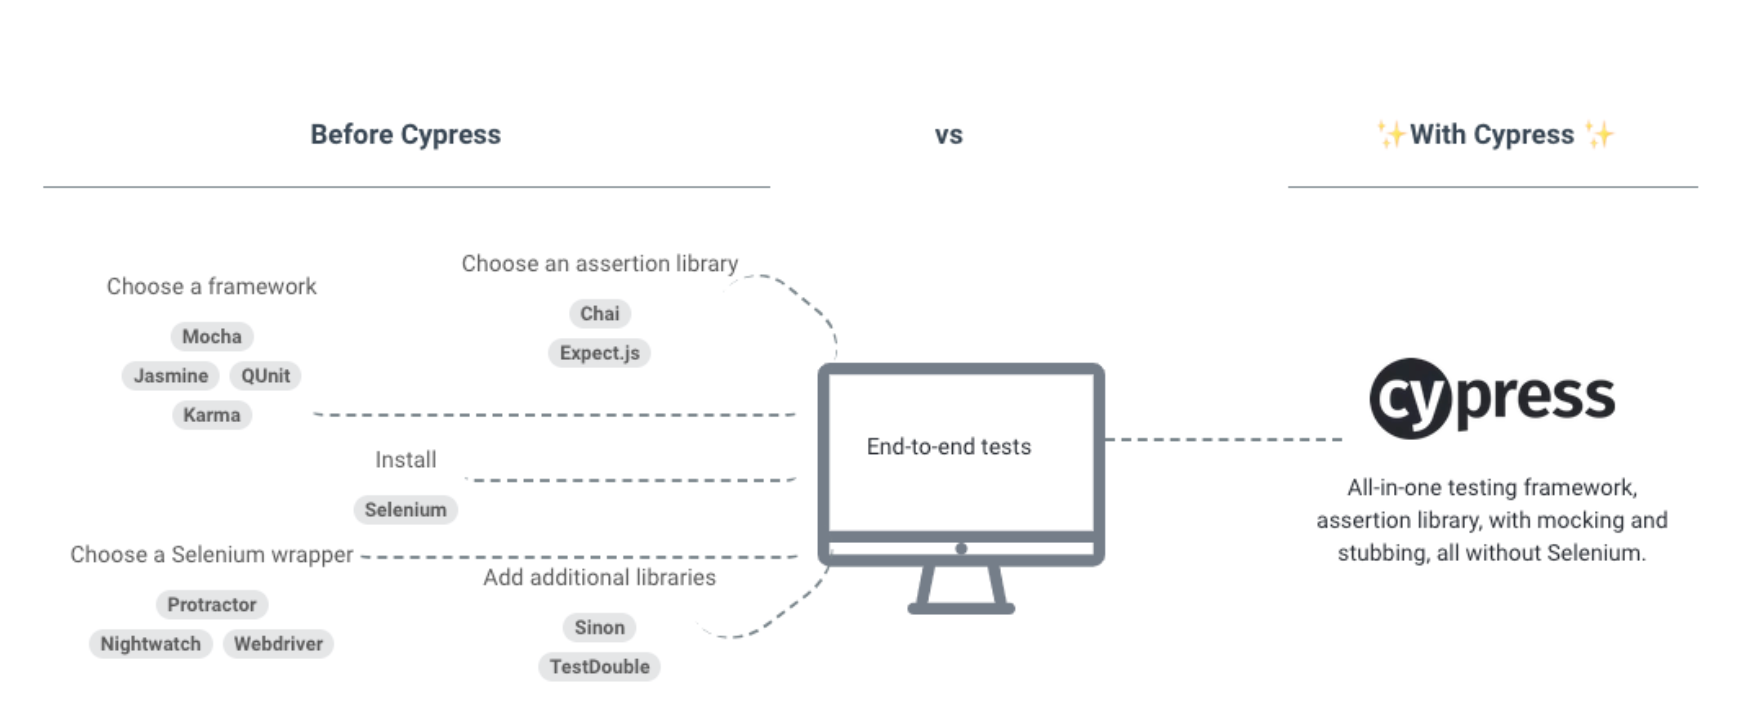
Cypress is a JavaScript test automation solution for web applications. It is an all-in-one testing framework that provides a chai assertion library with mocking and stubbing.Moreover, it supports the Mocha test framework, which can be used to develop API as well as web test automations supporting Chrome, Firefox, Edge and Electron browsers. Learn more at the Cypress official website.
Key Features
- Mocking - By mocking the server response, it has the ability to test edge cases.
- Time Travel - Take snapshots as tests run, allowing to go back and forth in time during testing.
- Flake Resistant – It automatically waits for commands and assertions before moving on.
- Real Time Reloads - It automatically reloads whenever you make changes to your tests.
- Consistent Results - It gives consistent and reliable tests that aren’t flaky.
- Network Traffic Control - Easily control, stub, and test edge cases without involving your server.
- Automatic Waiting - It automatically waits for commands/assertions without adding waits or sleeps.
- Screenshots and Videos - View screenshots taken automatically on failure, or videos of entire test.
- Debugging - Readable error messages help you debug quickly.
Getting Started
This guide explains to you in detail how to get started with installing cypress and getting to build your first specification for API and UI tests.
Pre-requisites
- Node version 10 or above should be installed. For more information follow steps here
- Code editor like VSCode in installed
Install cypress
Cypress can be downloaded directly from the Cypress website (https://www.cypress.io/) for the version of your choice. This will download a zip file, which can be extracted by the user.
OR
You can use npm command to install cypress using Visual Studio Code editor and launch a terminal window..
npm install cypress --save-dev
Clone the Project
Using a shell window, cd into the folder path where you would like to clone the repository and use the command below
git clone https://github.com/sherrybath12/cypress.git
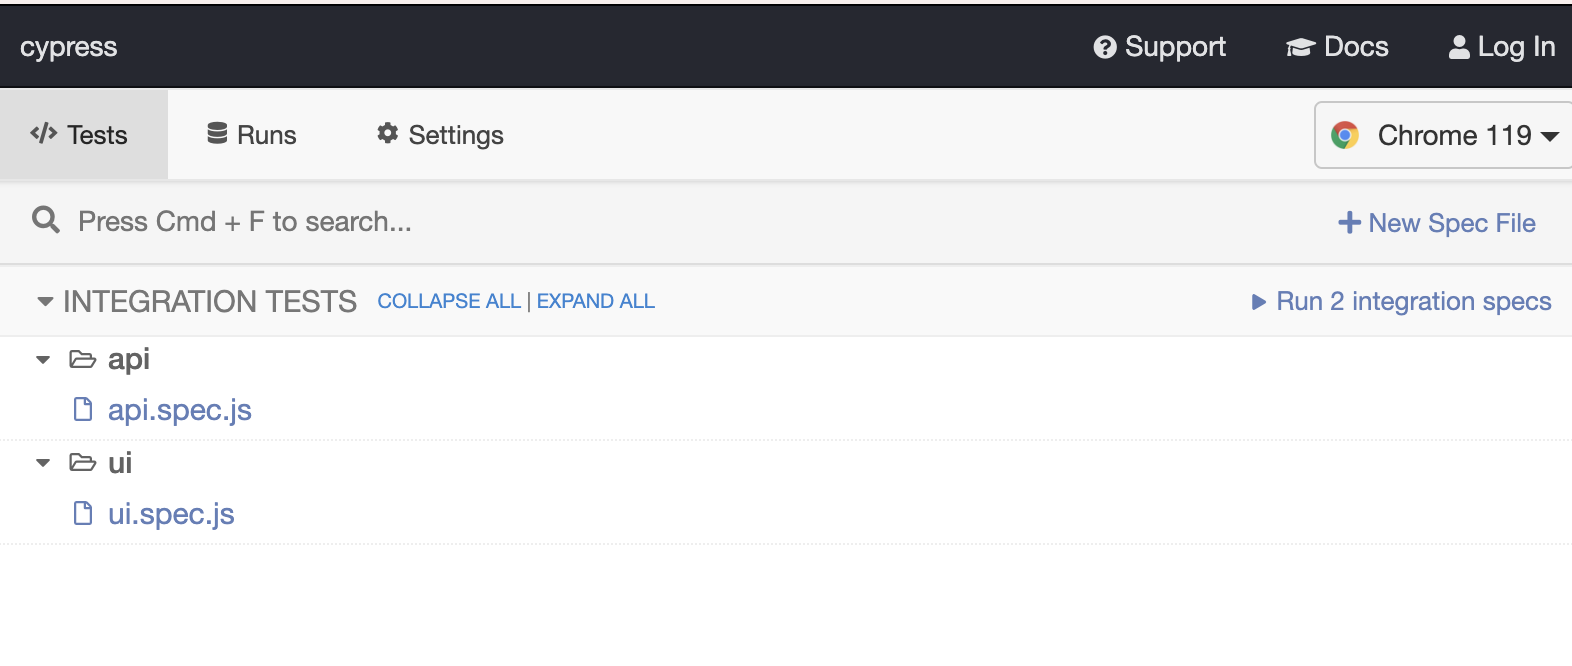
Project Structure
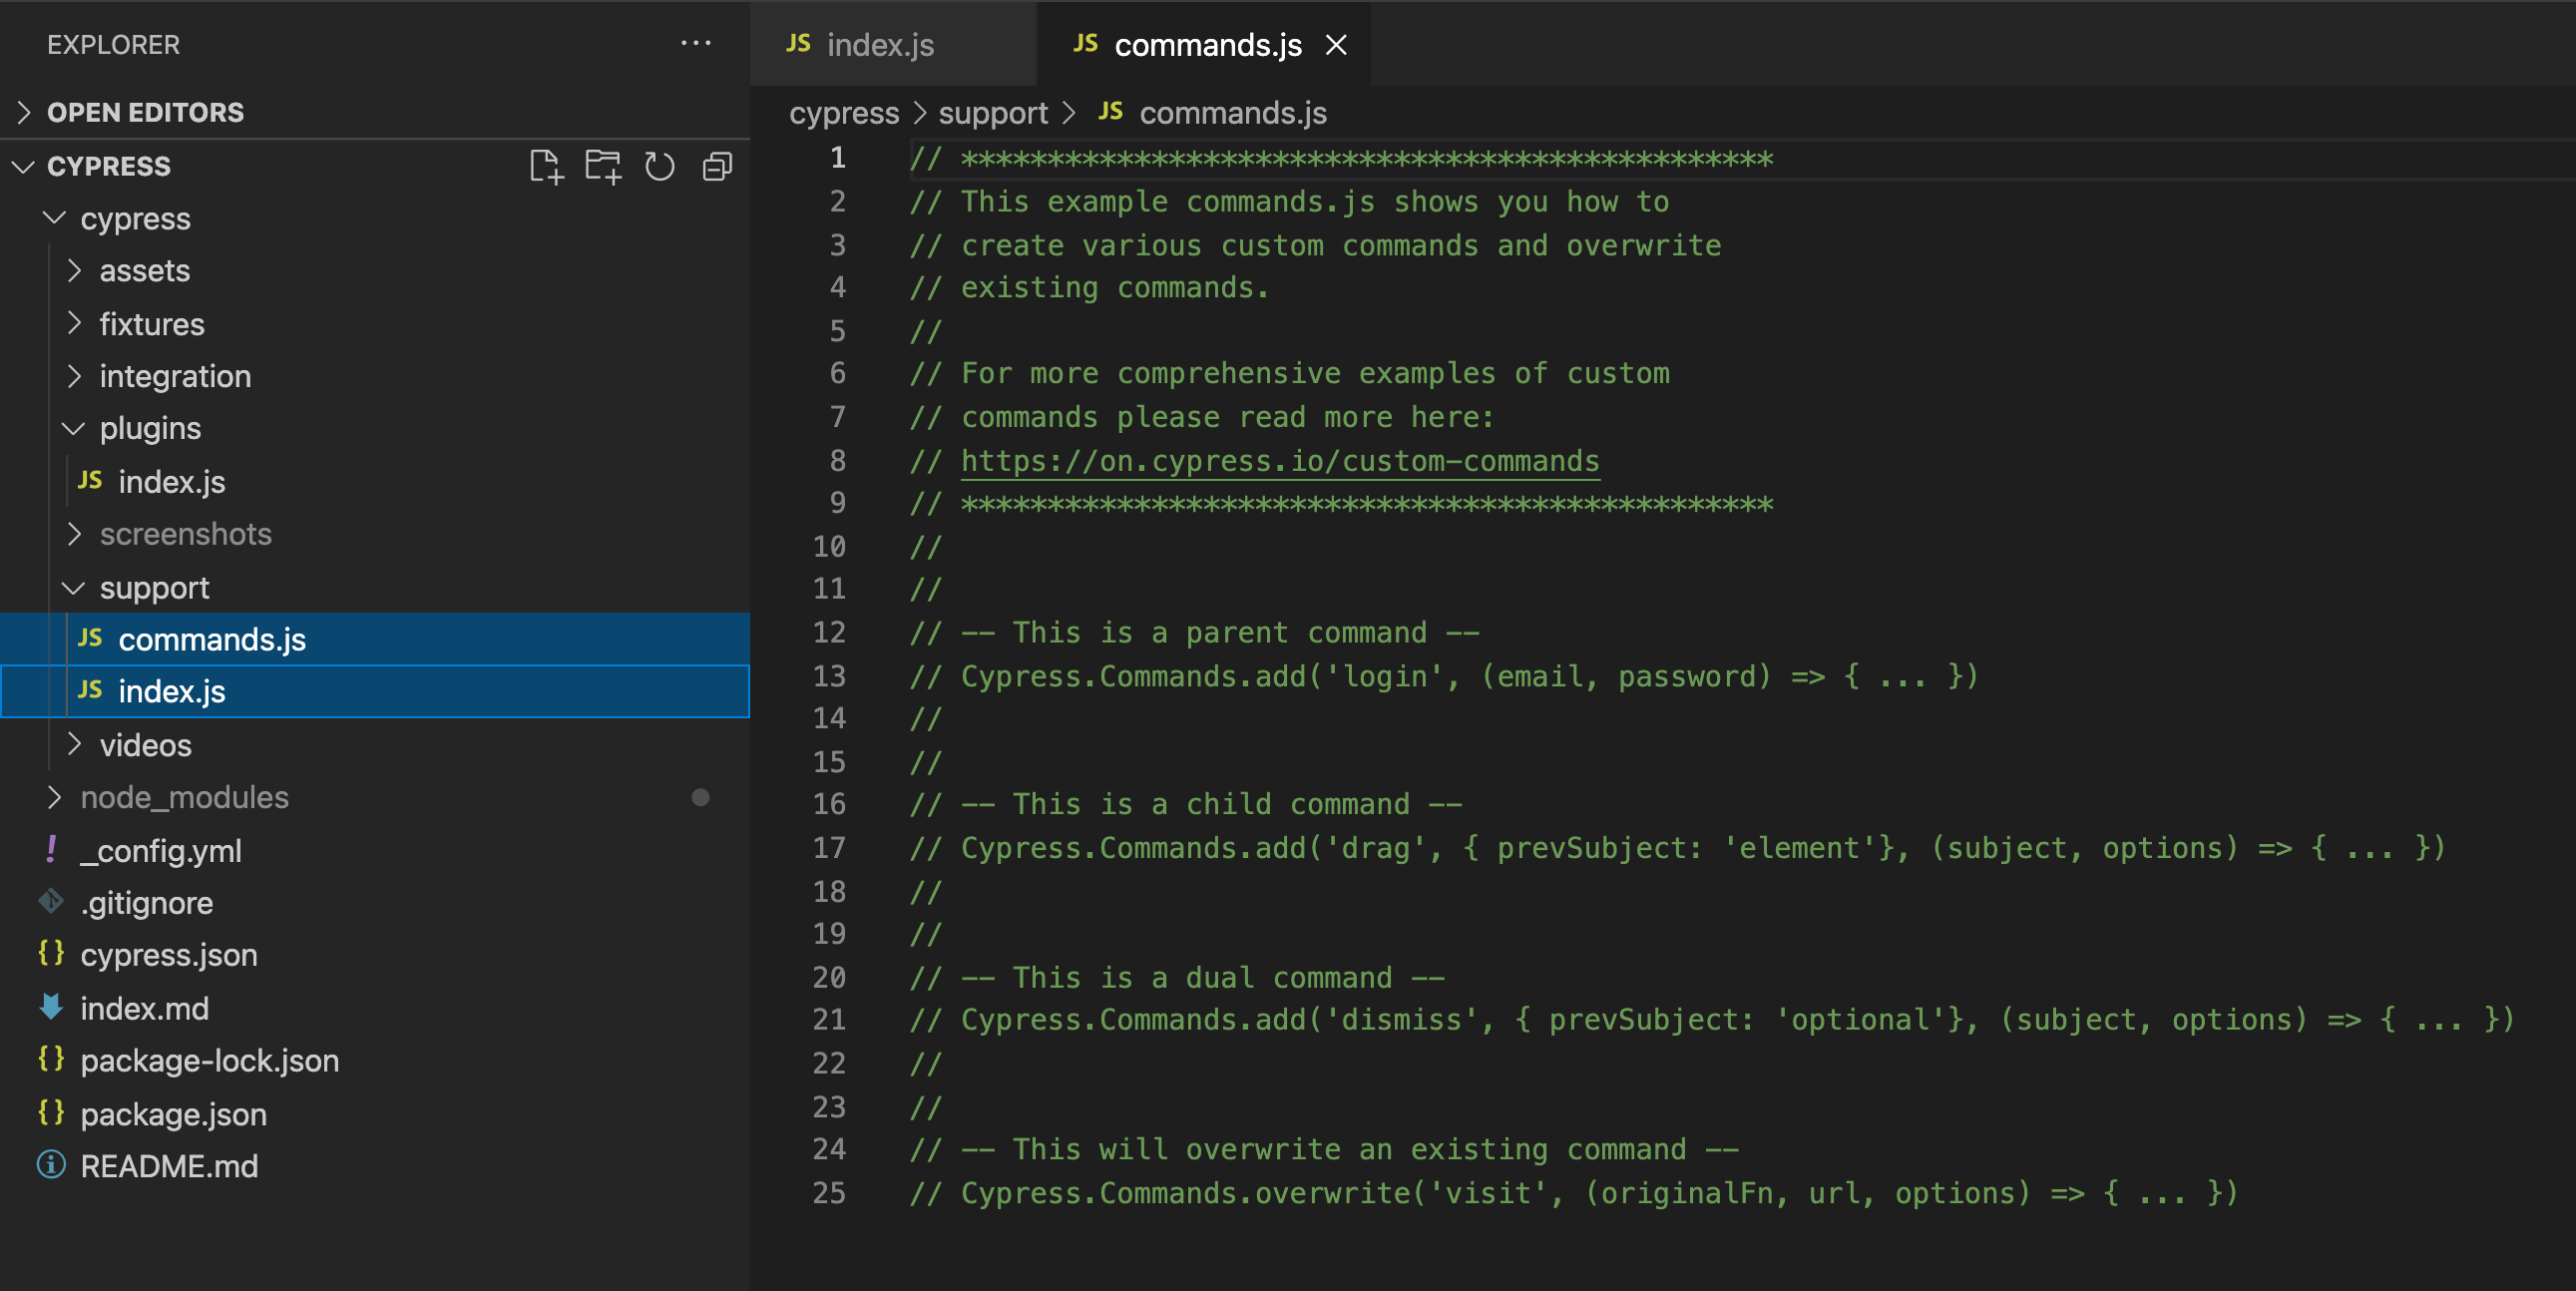
After cloning this project, Cypress will scaffold out the below folder structure:
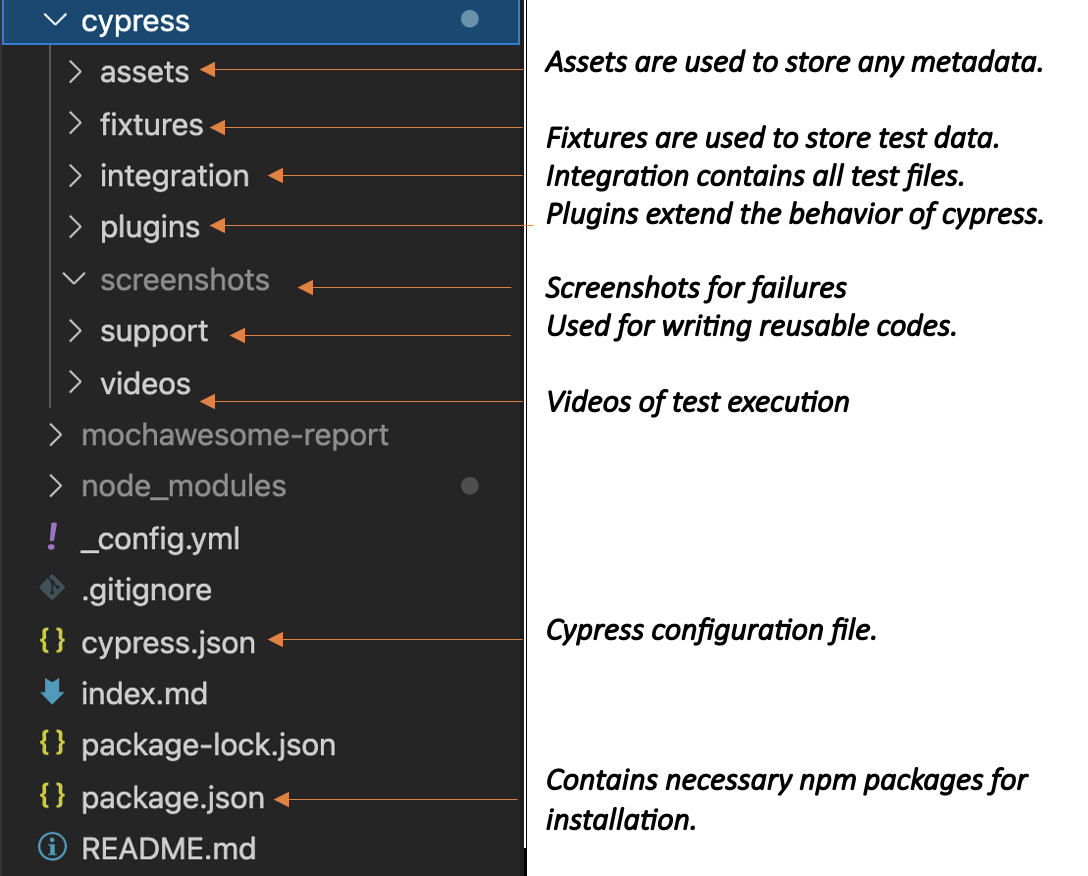
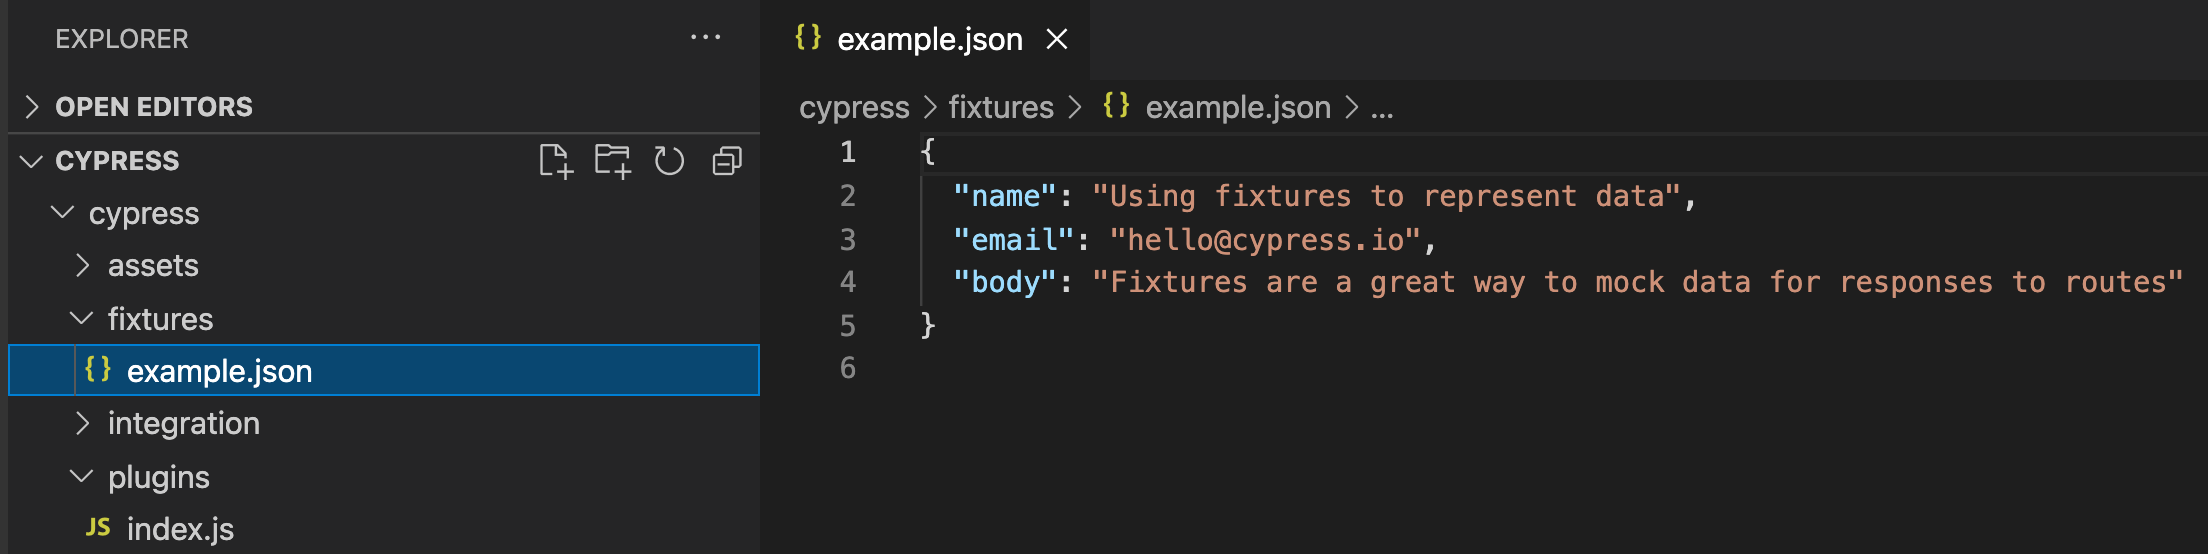
Fixtures – Fixtures are used to store test data which can then be used throughout the tests. Usually, the data is stored in JSON format.
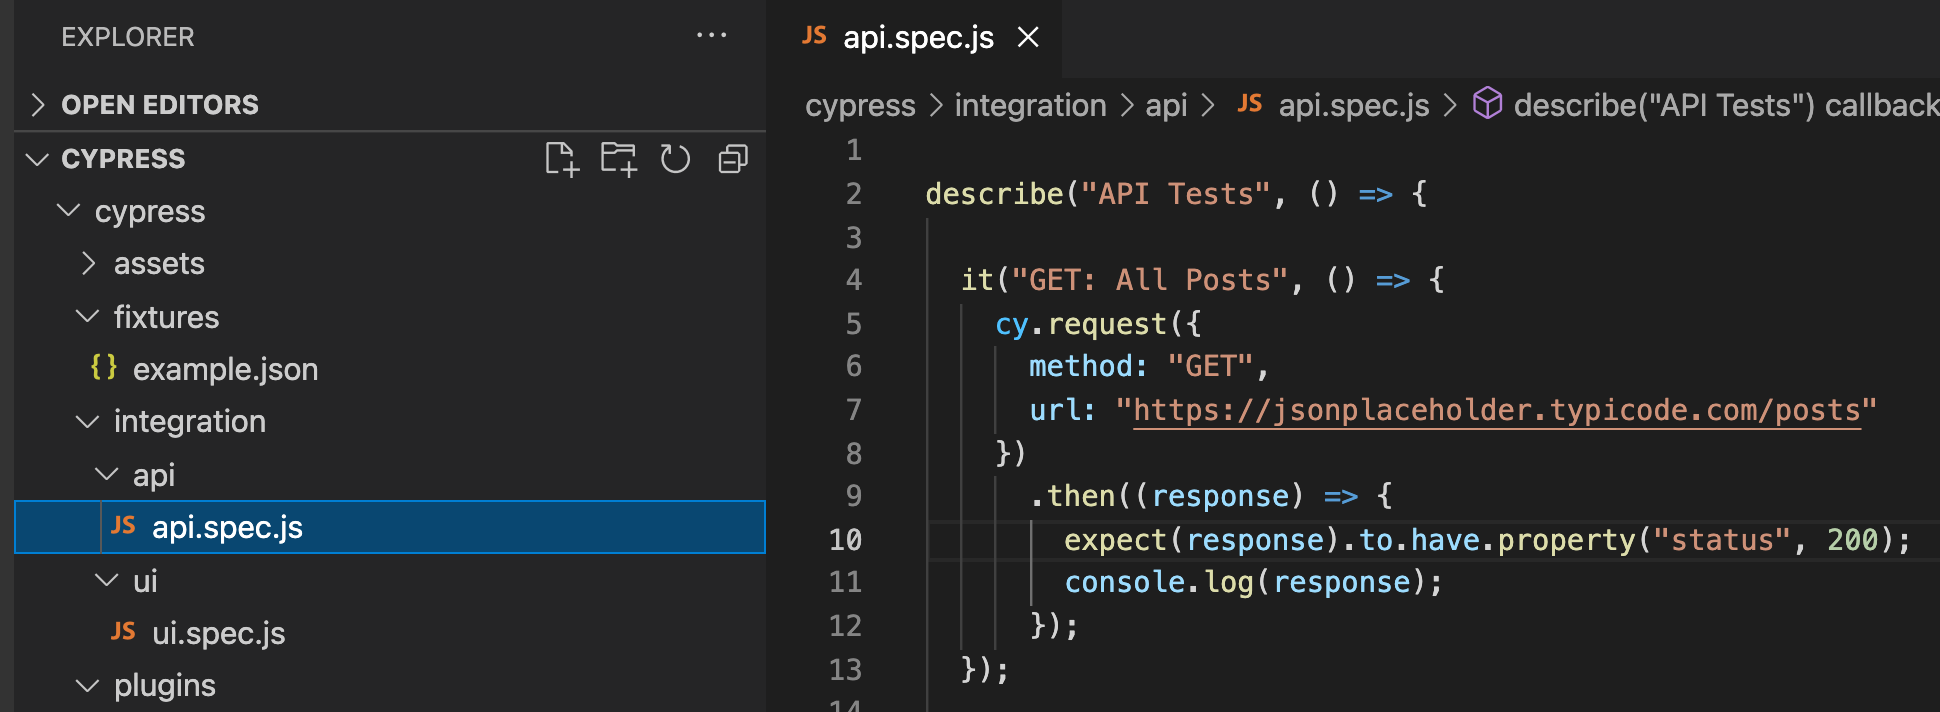
Integration – Integration folder includes all the test files. The test files may be written as .js, .jsx, .coffee and .cjsx. Usually the preferred extension is .js and the test file name format is testname.spec.js.
In this repostory you will find two script files:
integration/api/api.spec.js
integration/ui/ui.spec.js
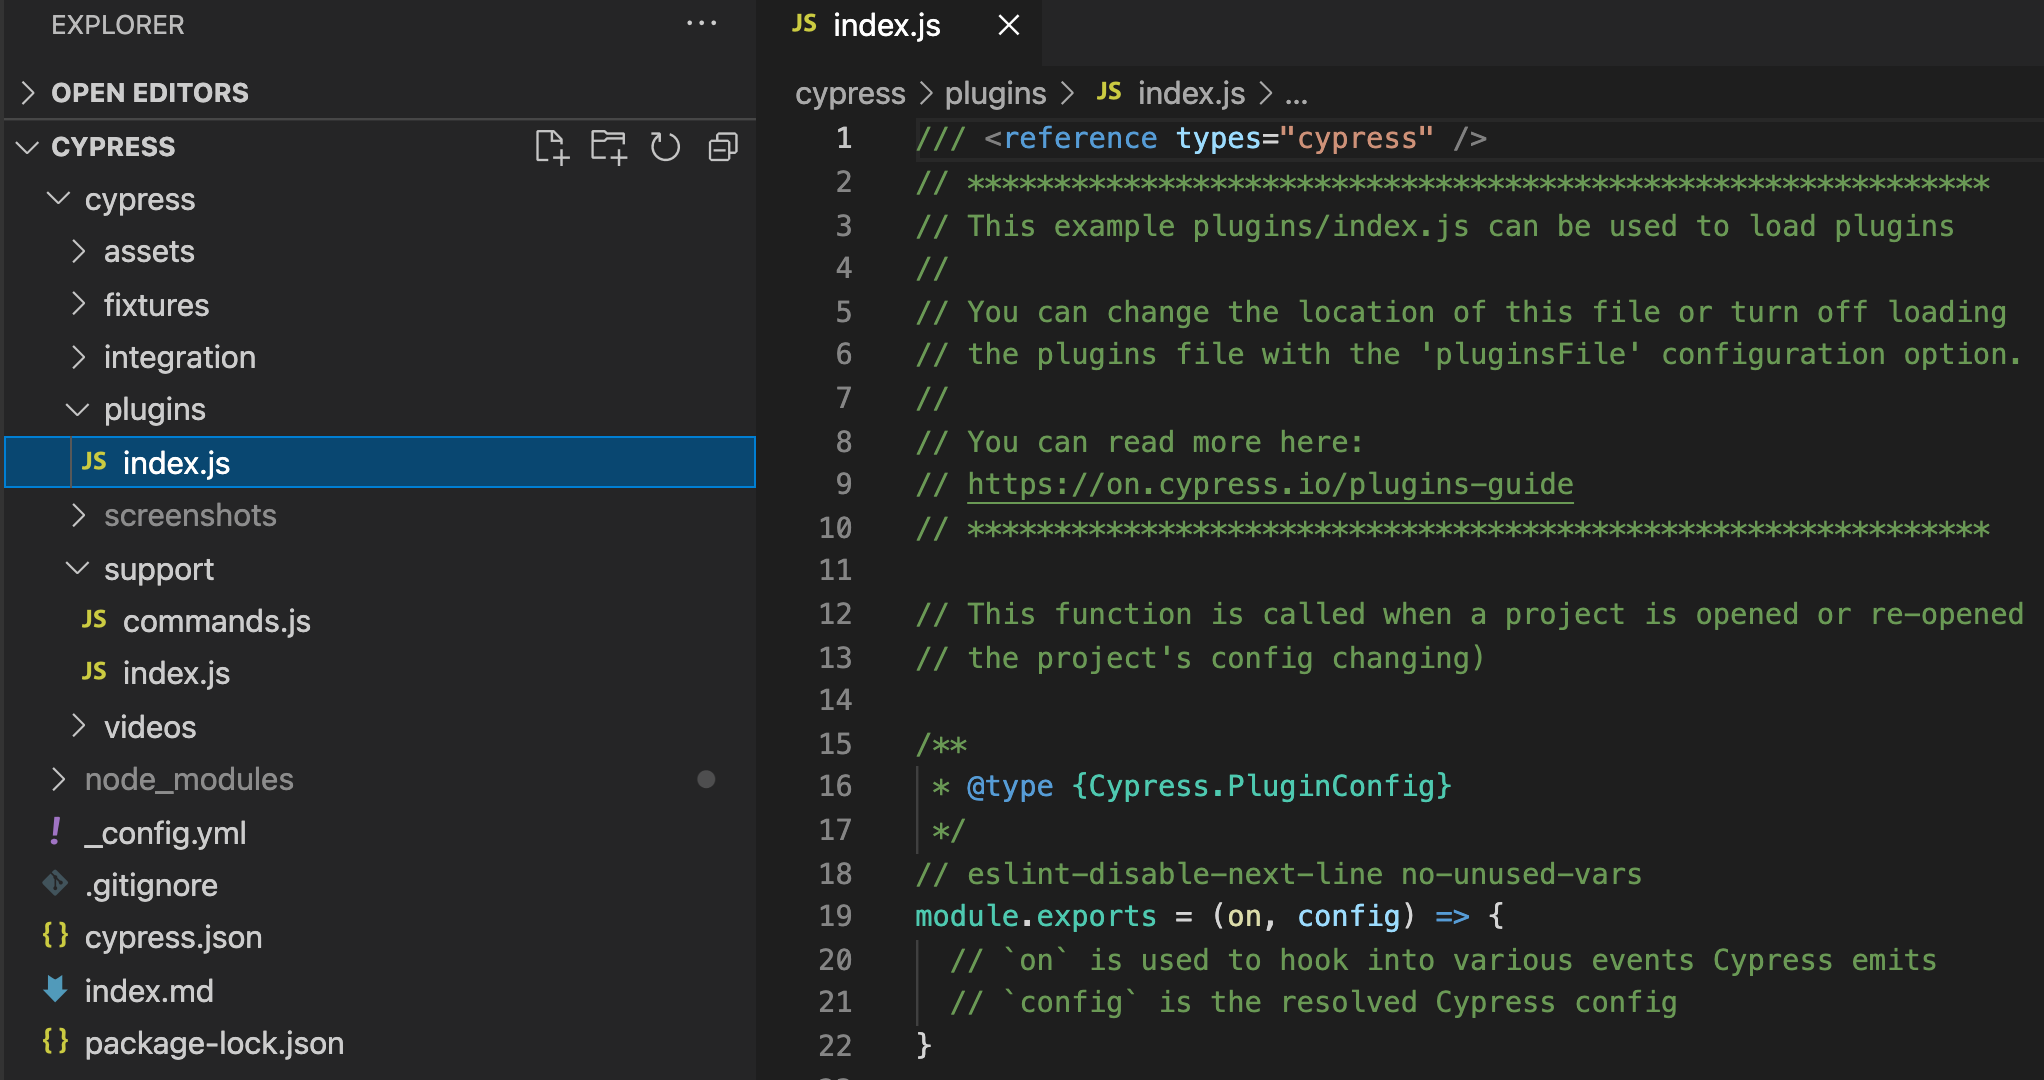
Plugins – This folder includes index.js file. This file will be automatically imported every time before the execution of every spec(test) file. Plugins enable you to tap into, modify, or extend the internal behavior of Cypress.
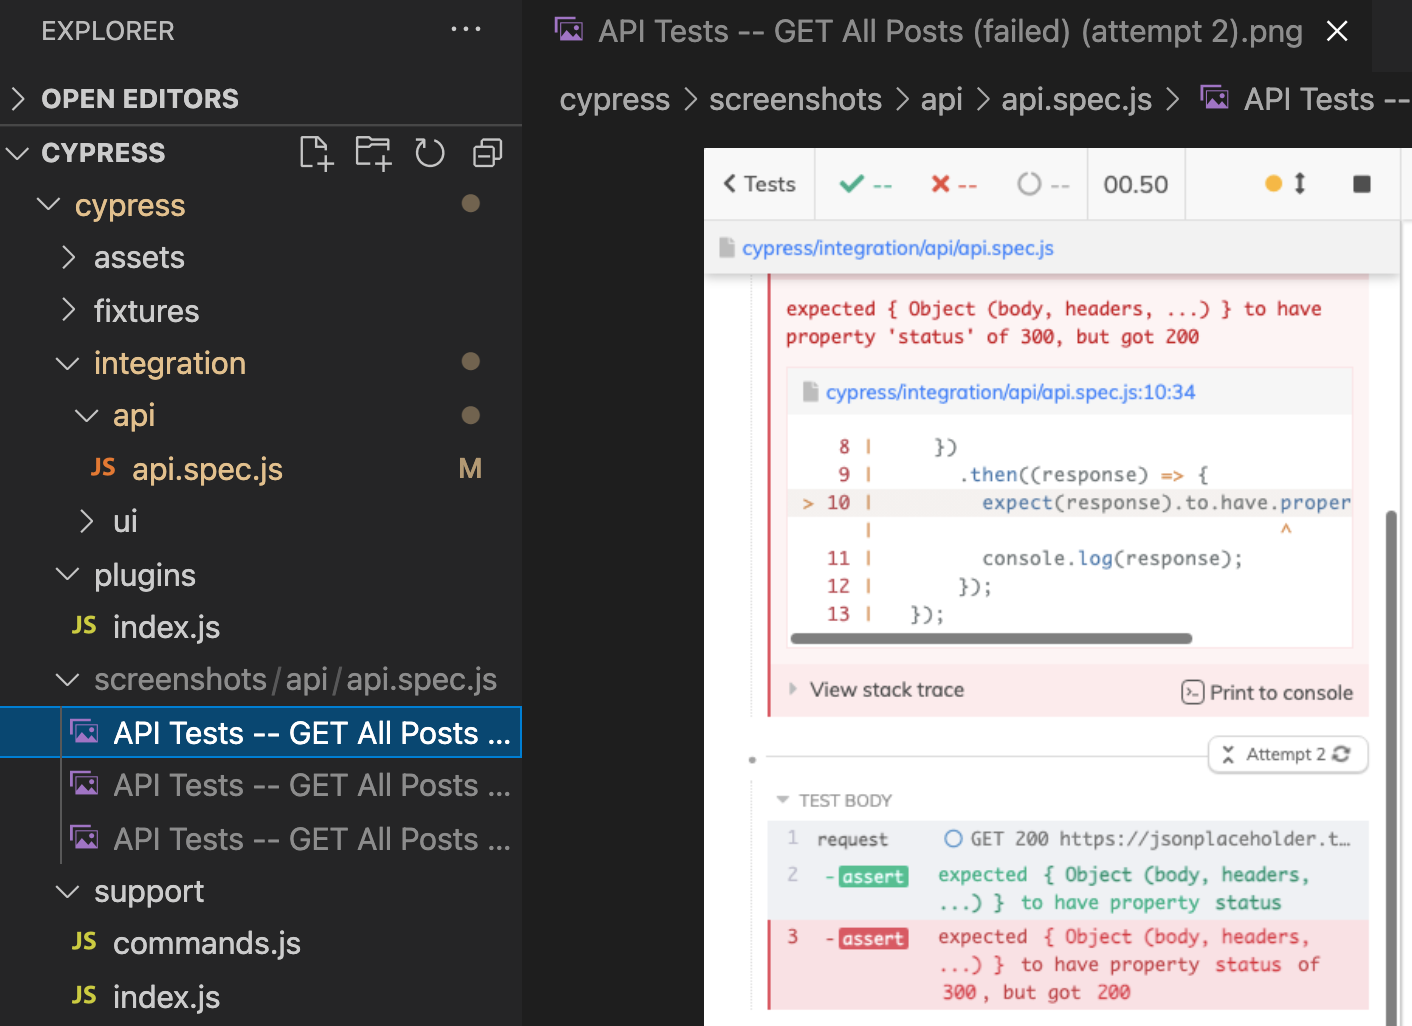
Screenshots – Cypress comes with the ability to take screenshots, whether you are running via cypress open or cypress run, even in CI. To take a manual screenshot you can use the cy.screenshot() command. Additionally, Cypress will automatically capture screenshots when a failure happens during cypress run.
Support – This folder contains index.js and commands.js files. This index.js file is run before every single spec file. The support folder is a great place to put reusable behavior such as custom commands or global overrides that you want to be applied and available to all your spec files.
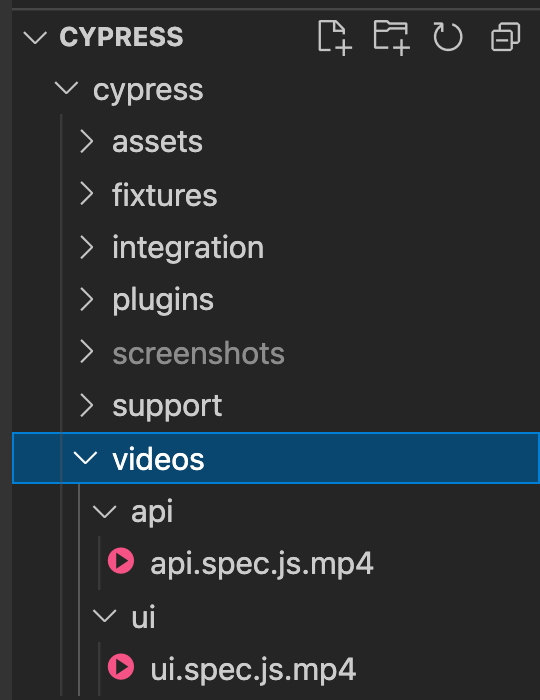
Videos – Cypress records a video for each spec file when running tests during cypress run. Videos are not automatically recorded during cypress open. Videos are stored in the videos folder which is set to cypress/videos by default.
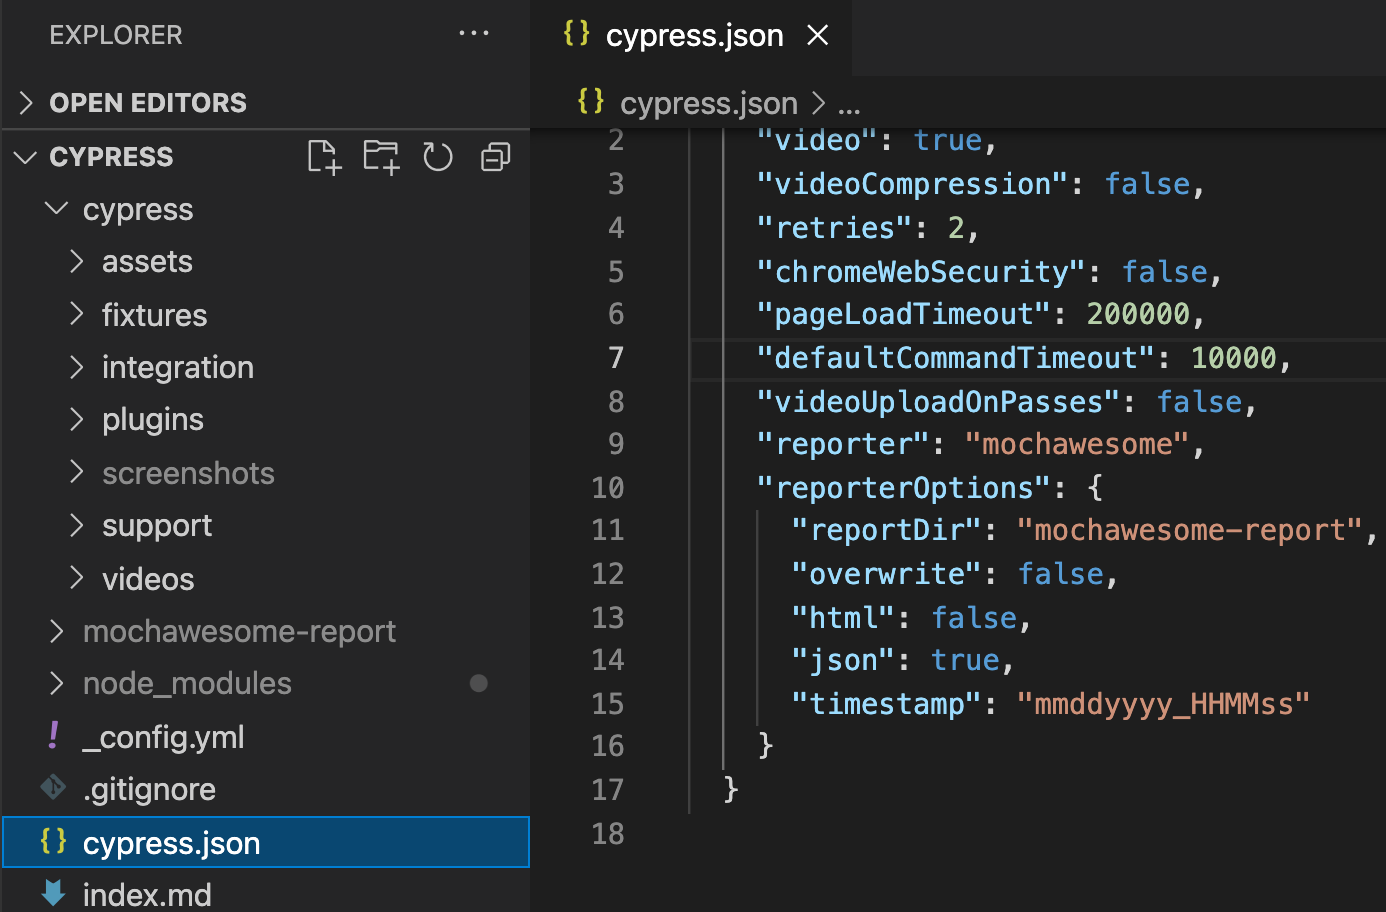
Cypress.json – It is used to save different cypress related configurations for eg. base URL, timeouts, etc. The default behavior of Cypress can be modified by supplying configuration options.
Package.json – It is used to save all npm dependencies and scripts names in the case where the tests are to be triggered directly from the terminal.
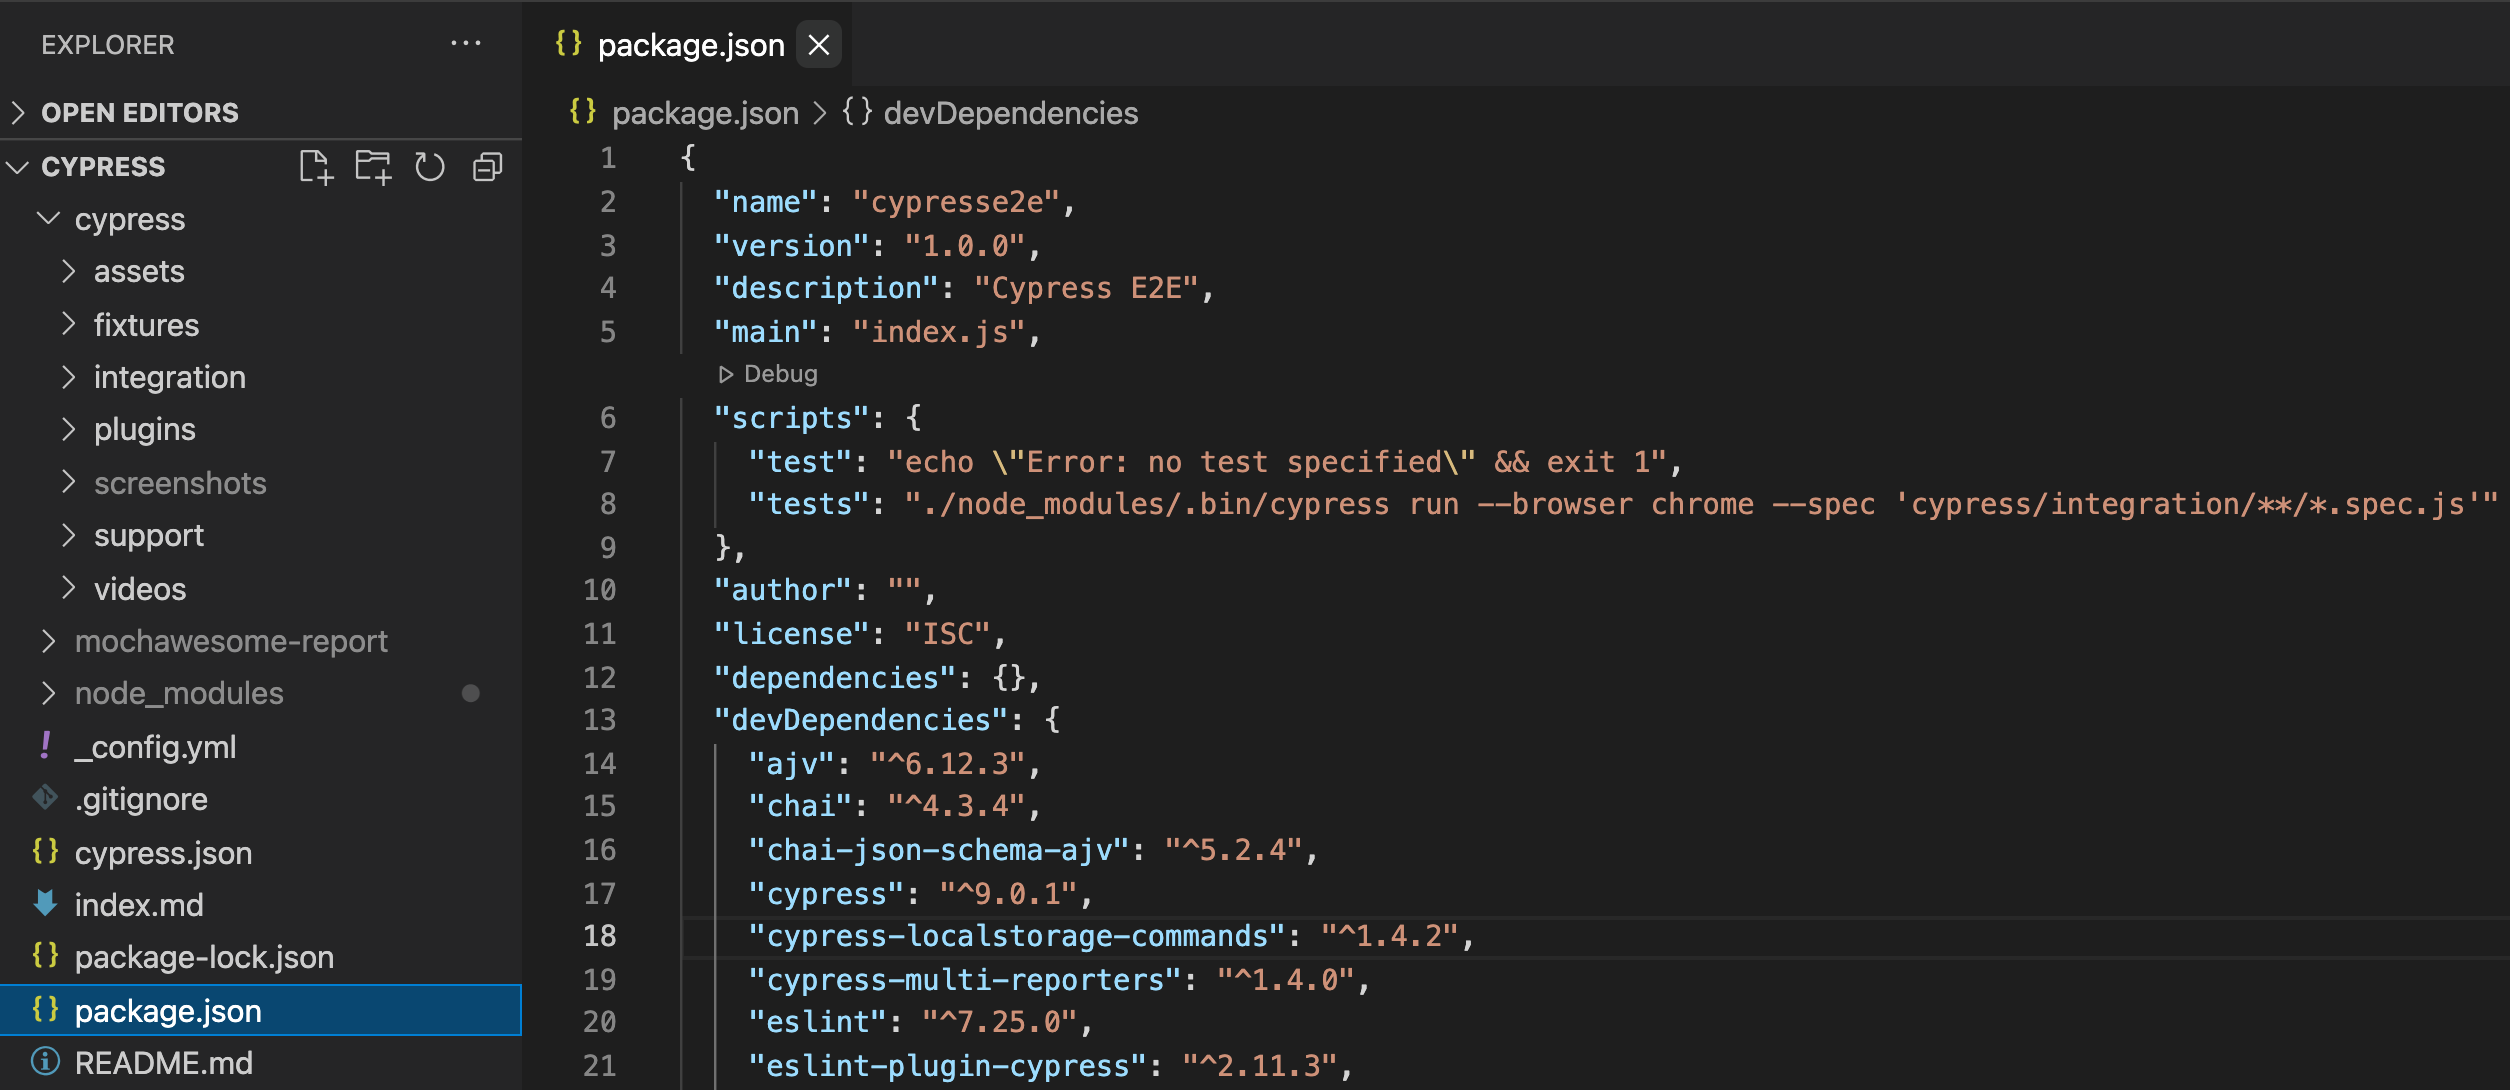
Line 8 depicts the syntax for the script name
Launching the Tests
Open a new terminal in VS Code and type the command:
npx cypress open
This will launch the cypress runner with the tests loaded.
Alternatively, the tests can be kicked off from the terminal by referencing the script name from the package.json
npm run <scriptname>
Running the Tests
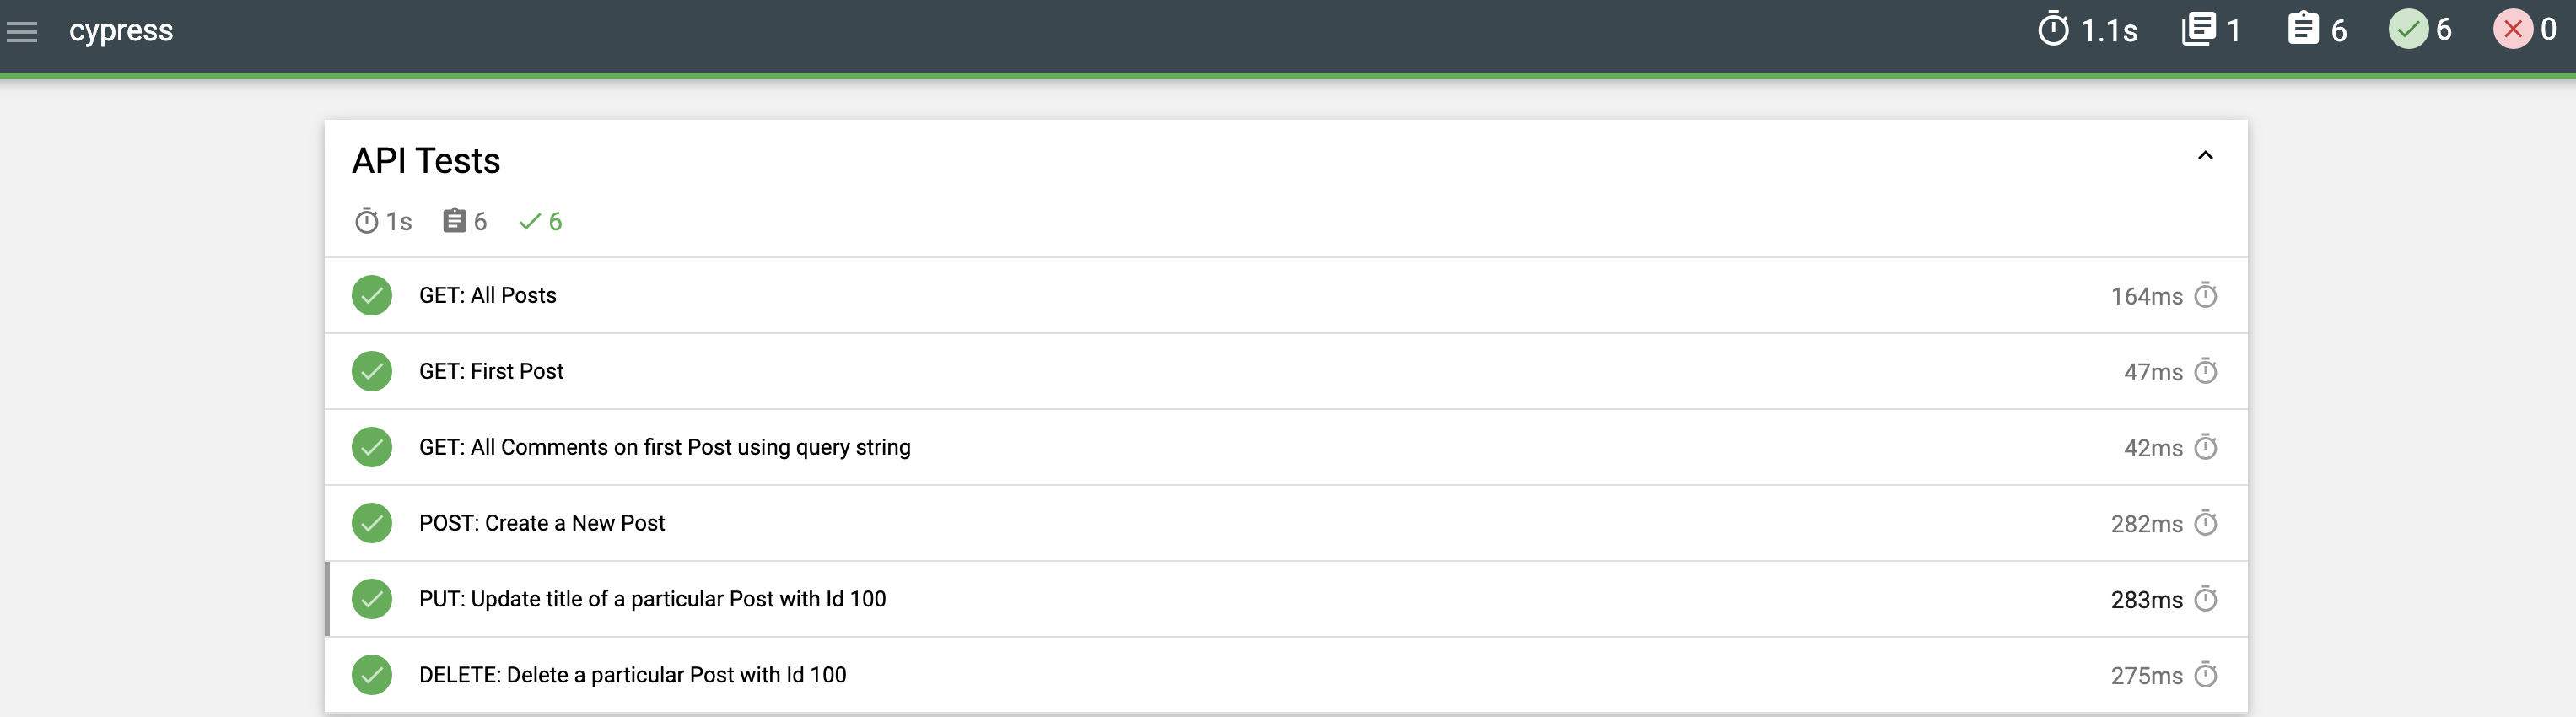
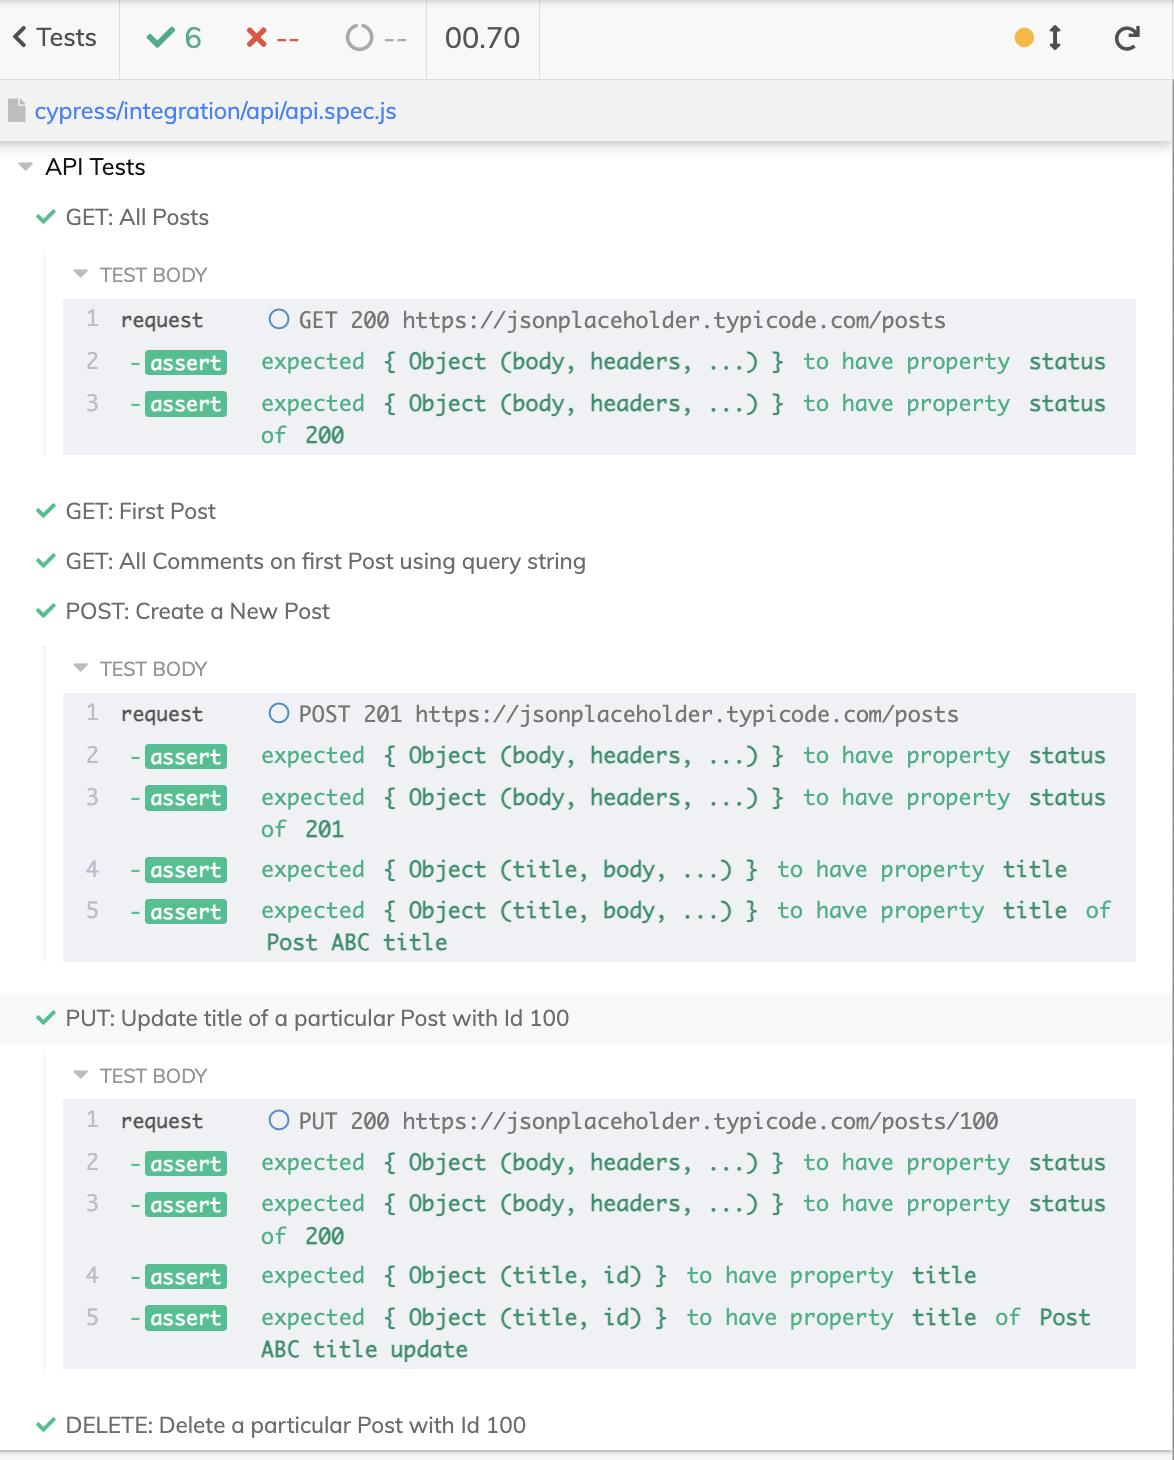
API Tests - The test can simply be run by clicking on the api.spec.js file.
Below is a snapshot of the all tests run successfully.
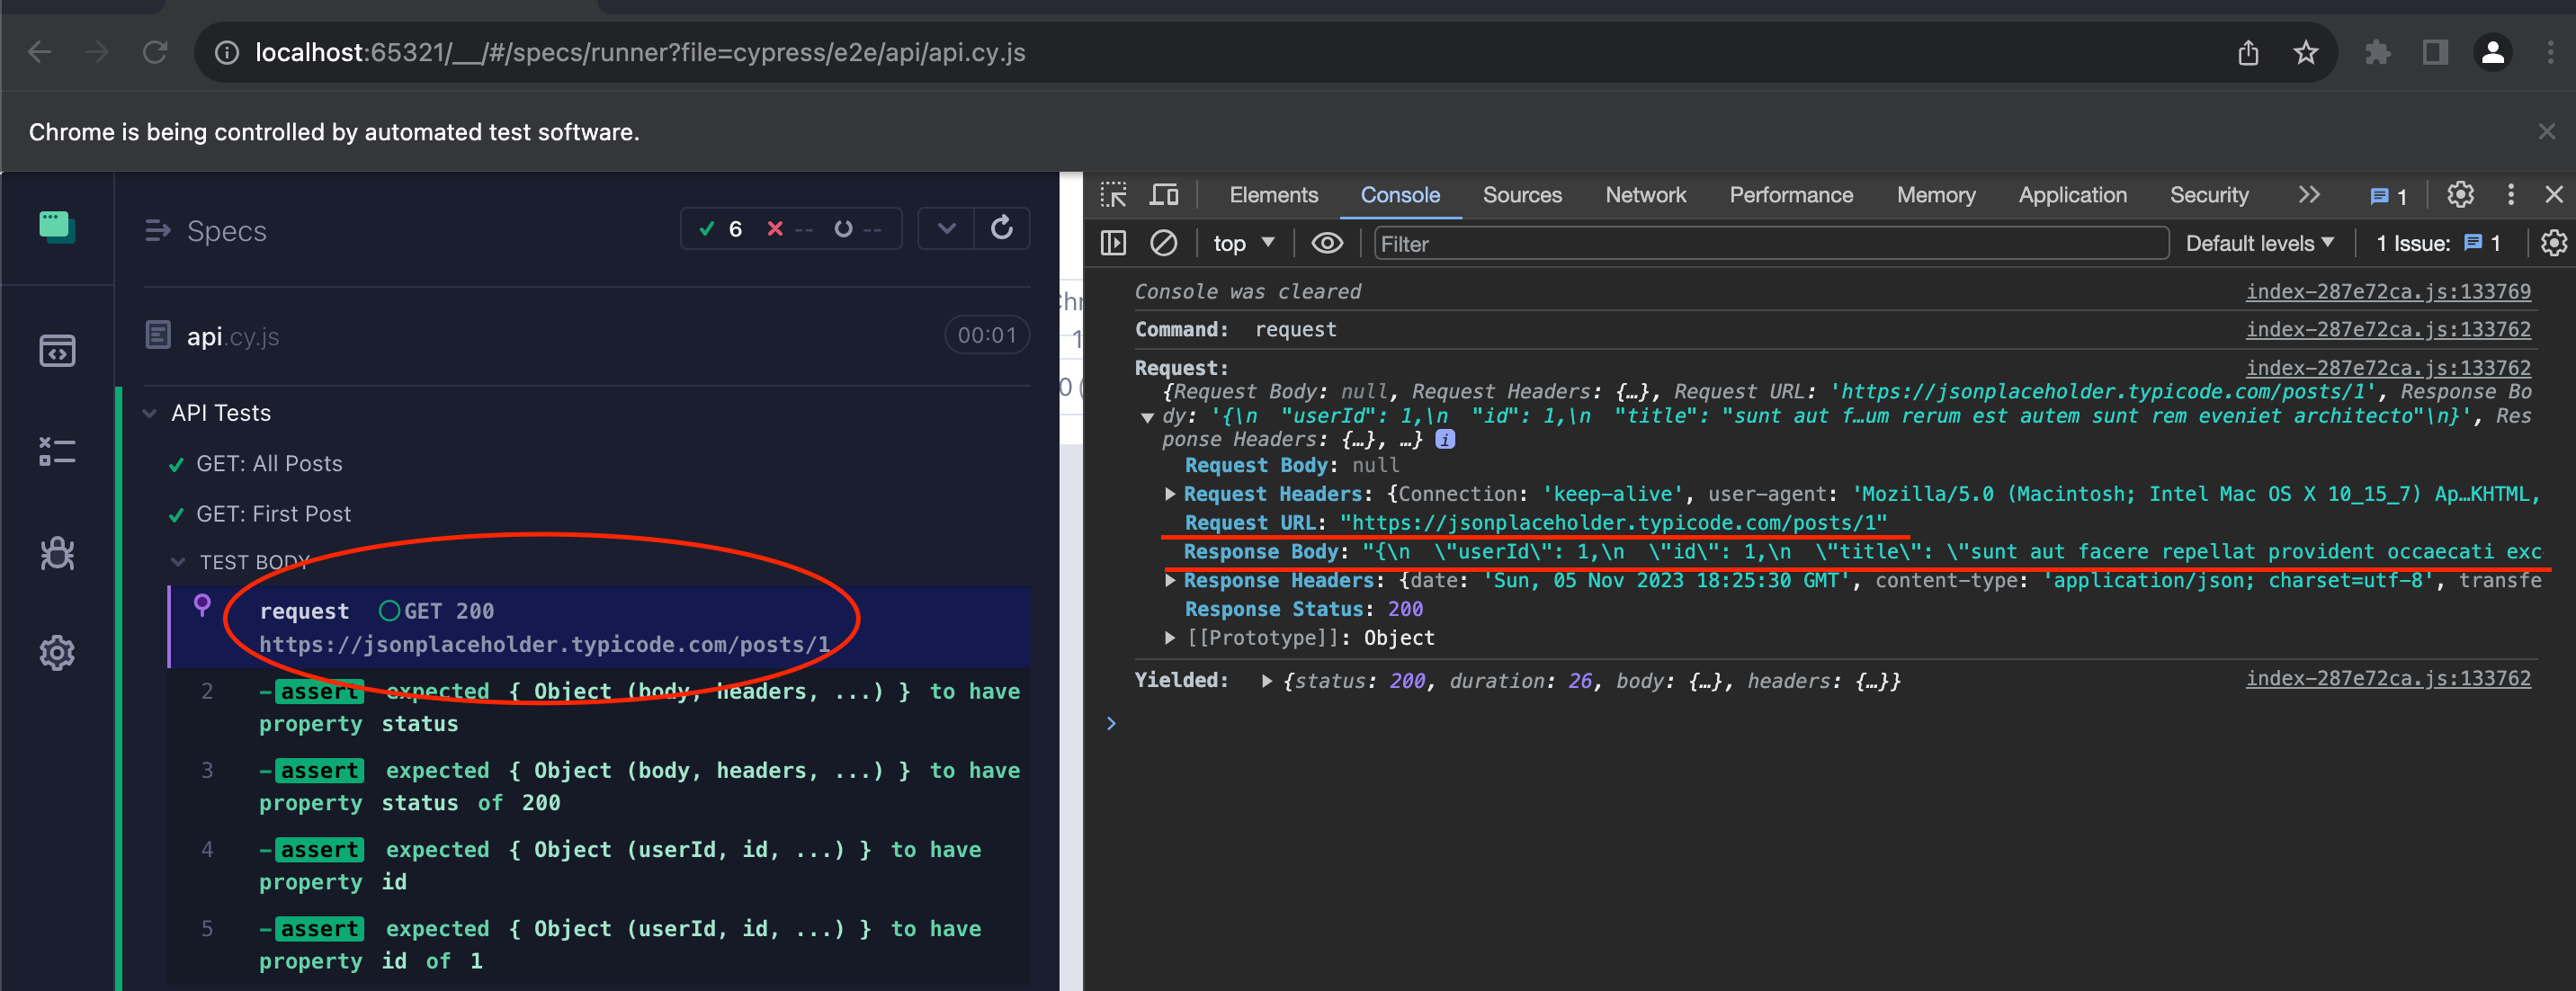
A snapshot of the requests and responses can be seen in the console window
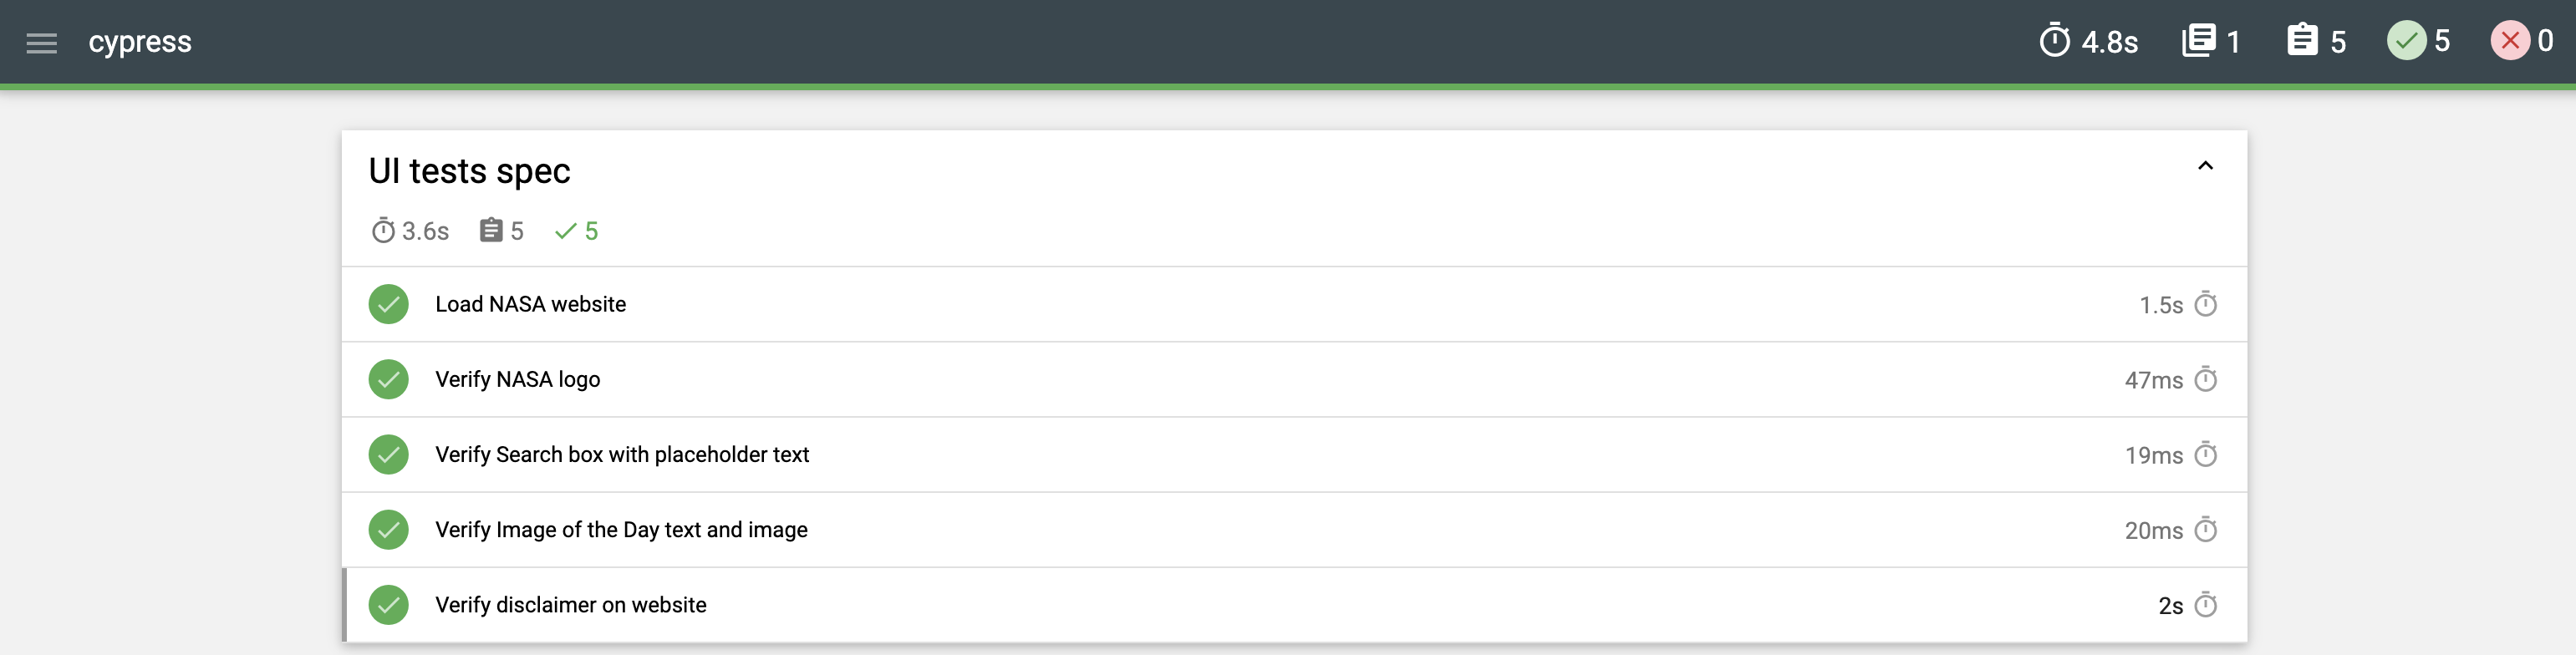
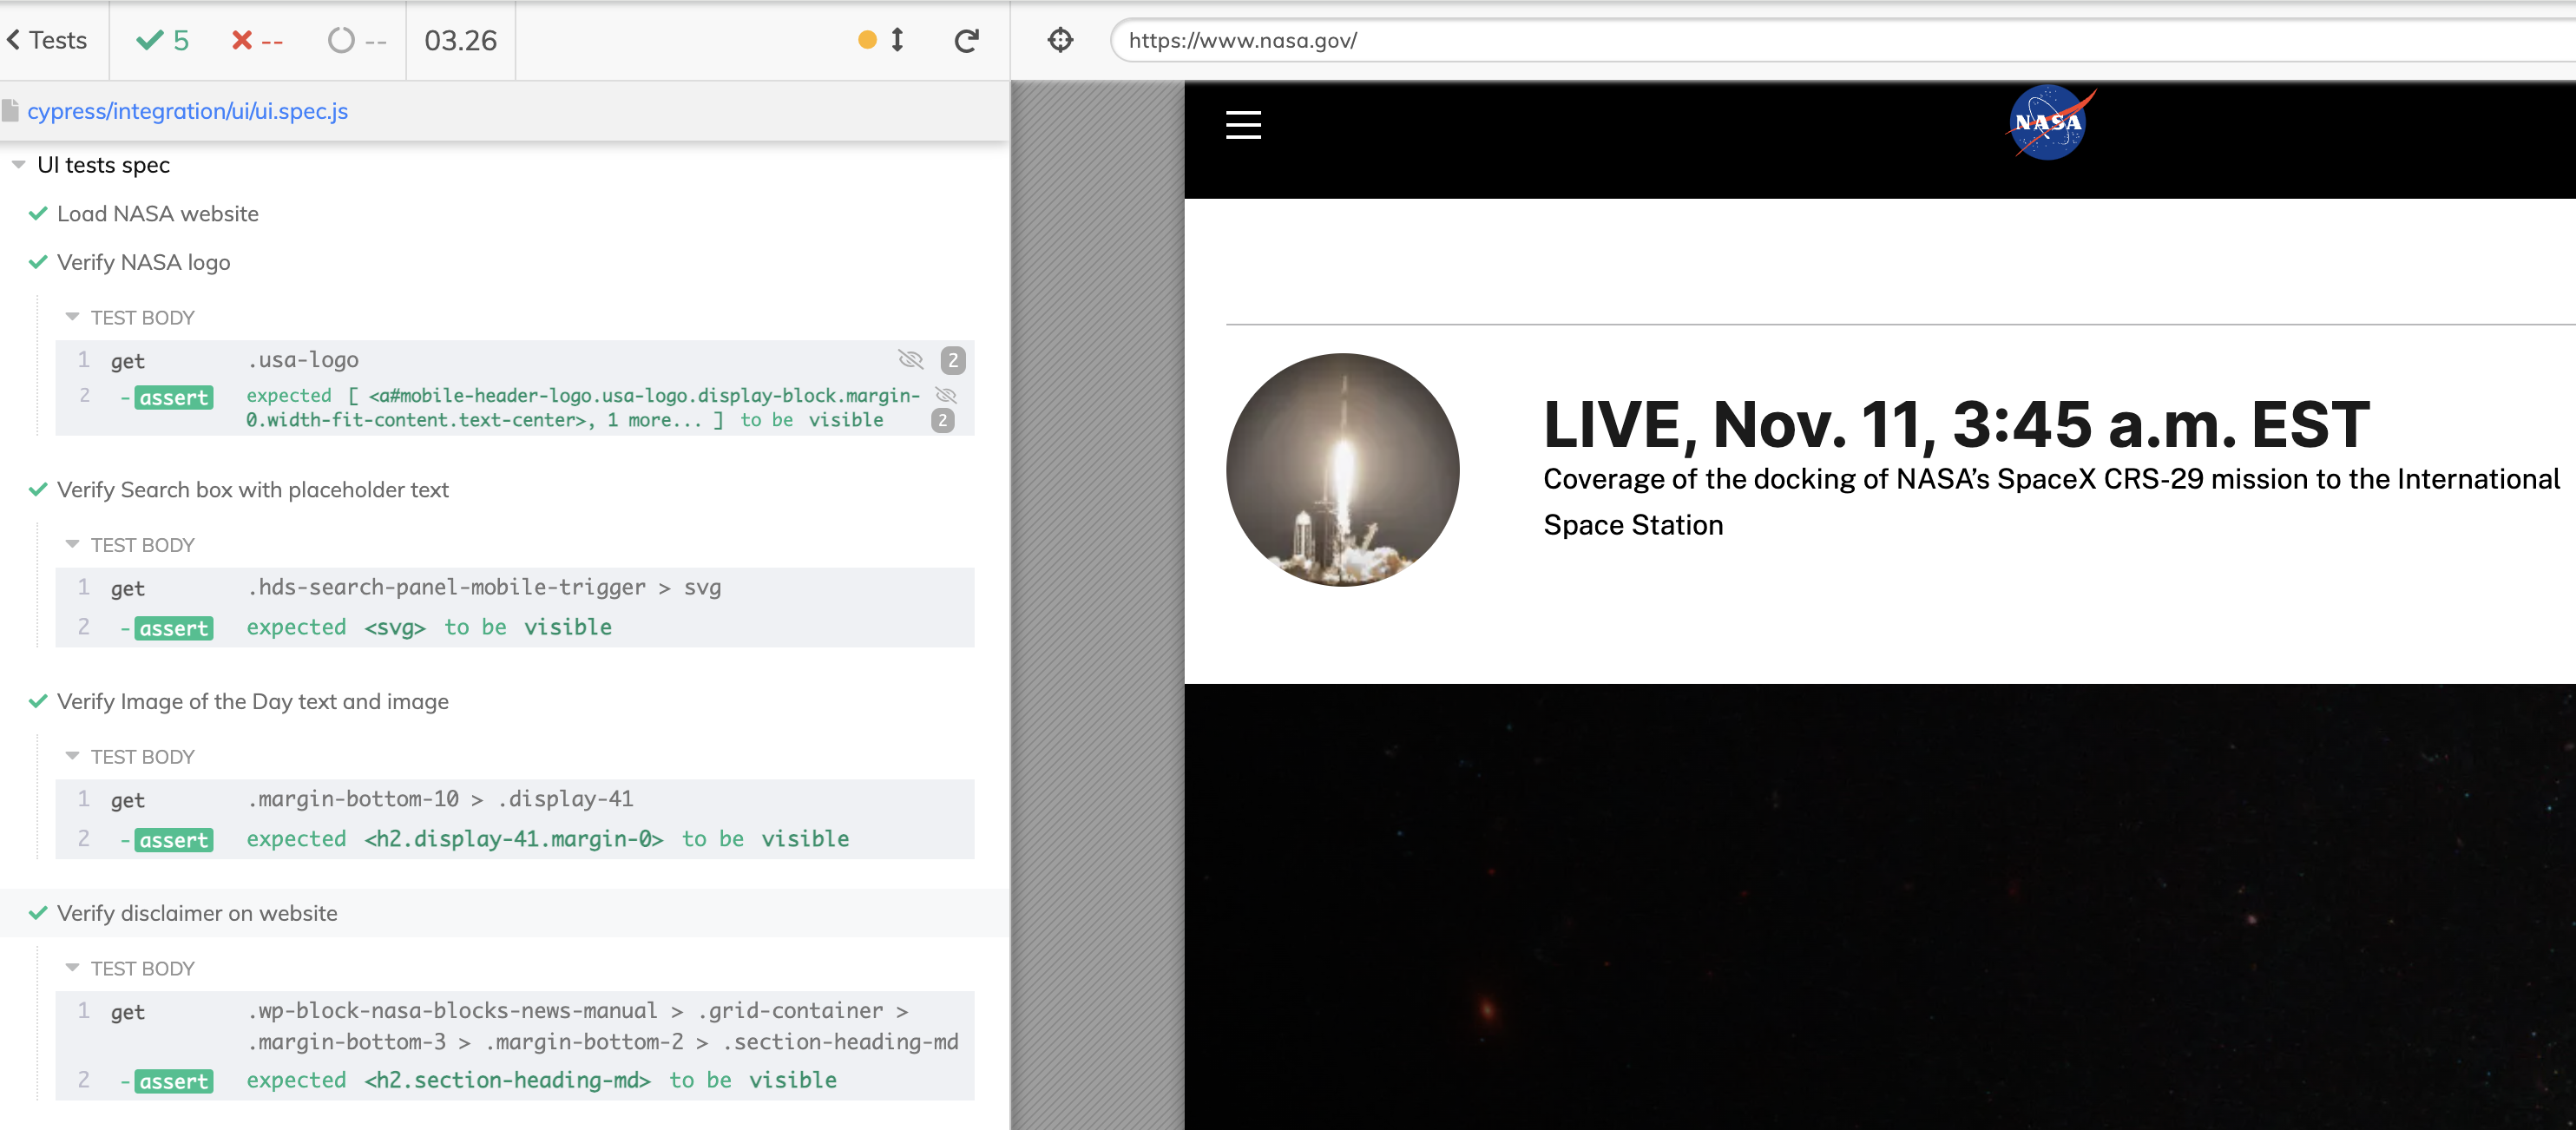
UI Tests - The test can simply be run by clicking on the ui.spec.js file.
Below is a snapshot of the all tests run successfully.
More About API Test Scripts
- The API test scripts are located under
cypress/integration/api/api.spec.js.- For this project, I have used the open source fake API’s at (https://jsonplaceholder.typicode.com/).
- The tests are implemented for atleast each of the following request methods - GET, POST, PUT, DELETE.
- The assertion checks for a 200 or 201 response and logs the response.
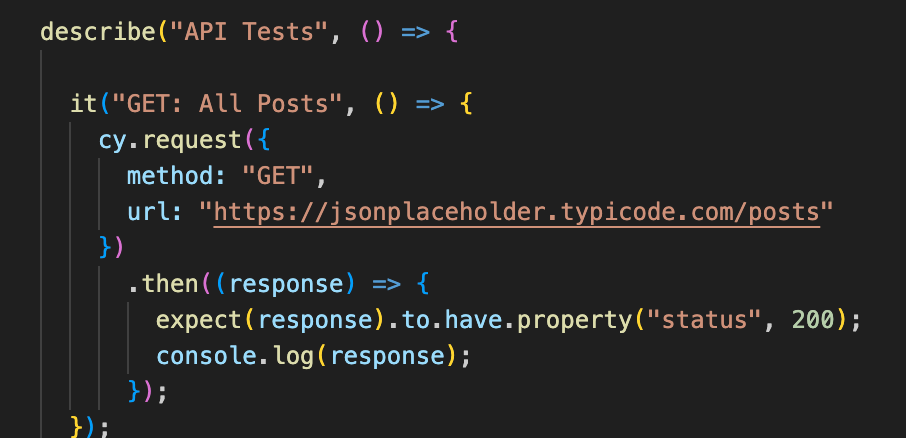
- GET METHOD
The method signature is
GETand displays all resources.
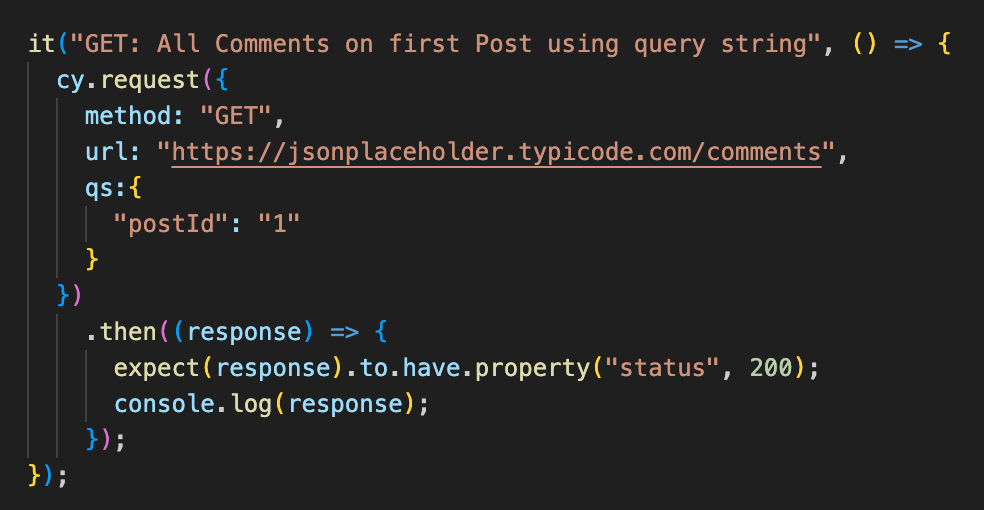
- GET METHOD with Querystring
The method signature is
GETand has a querystring parameter passed in.
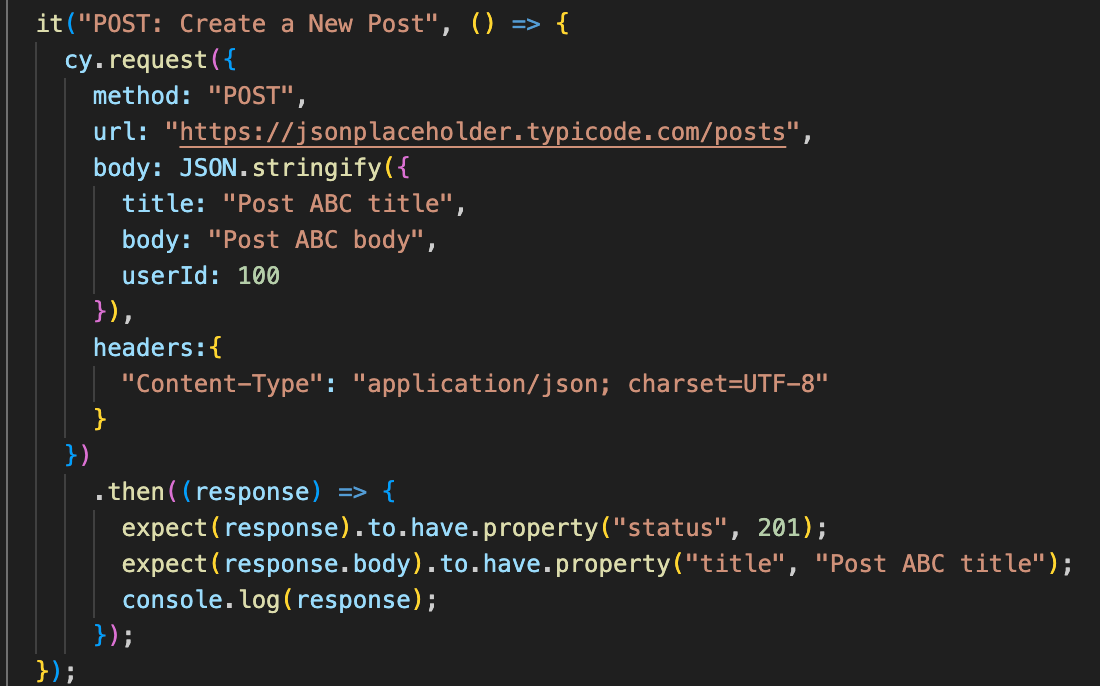
- POST METHOD
The method signature is
POSTand requires a request body with the resource to be created.
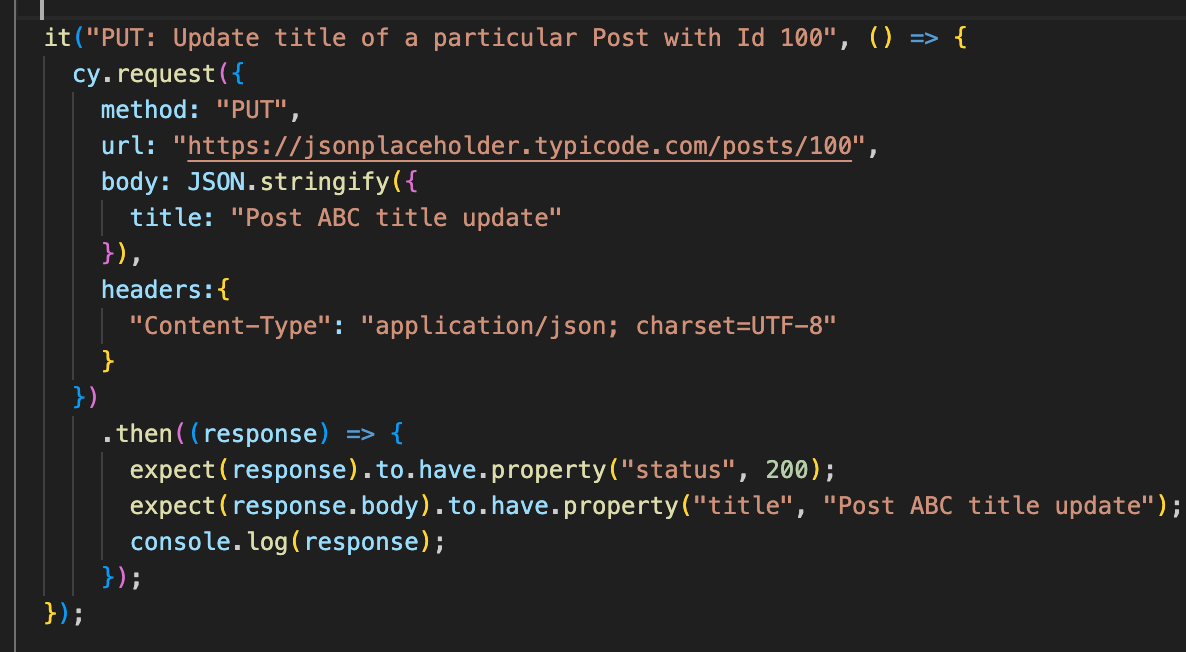
- PUT METHOD
The method signature is
PUTand does requires a request body with the resource parameters to be updated.
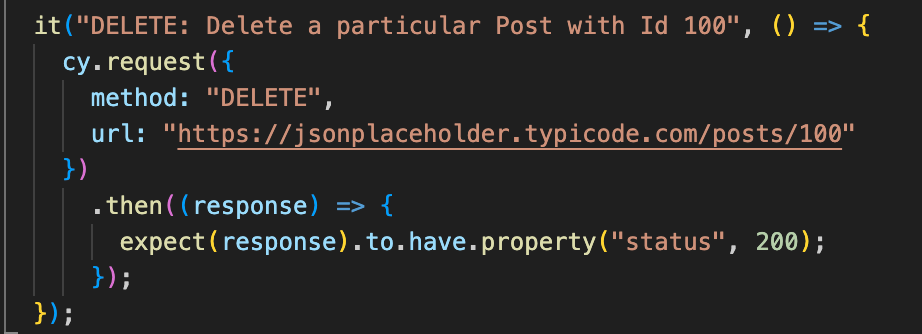
- DELETE METHOD
The method signature is
DELETEand requires the resource id to be deleted.
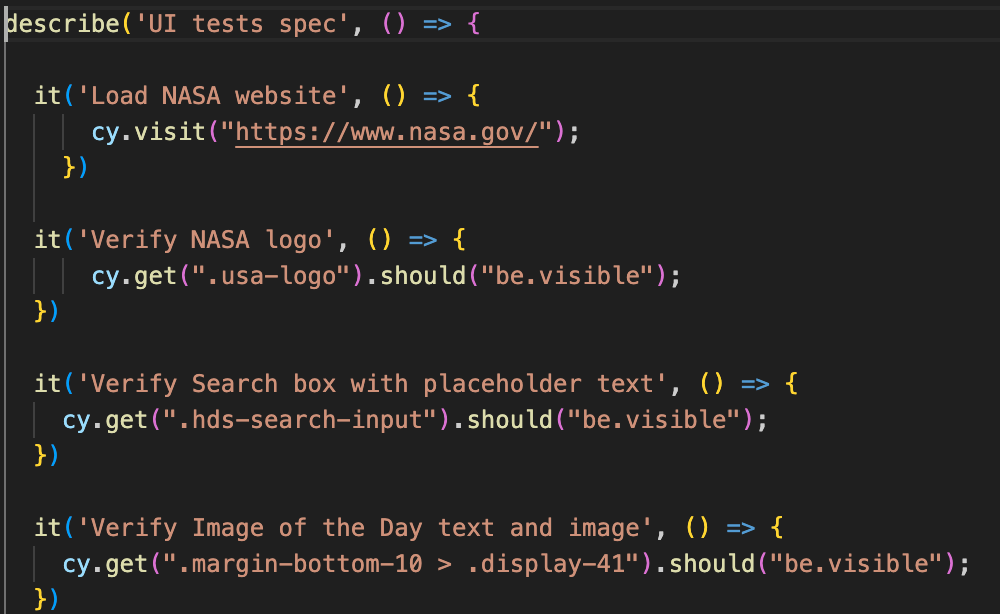
More About UI Test Scripts
- The UI test scripts are located under
cypress/integration/ui/ui.spec.js. - For this project, I have used the Nasa website (https://nasa.gov/).
- The tests implemented assert loading the website and presence of certain components on the UI.
Reports
The tests can be configured to generate beautiful reports using report generation packages like mochawesome using the steps below:
npm i mochawesome
Update the cypress.json for report parameters like format and target output directory.
 "reporter": "mochawesome",
    "reporterOptions": {
      "reportDir": "mochawesome-report",
      "overwrite": false,
      "html": false,
      "json": true,
      "timestamp": "mmddyyyy_HHMMss"
    }
The reports can be found at: /mochawesome-report/*.html